In recent years, DIY crafts have found their way into the hearts of many, offering a means of creative expression and a stride toward environmental consciousness.
Crafting your own tea bags brings an eco-friendly angle to the table and gives creators the ability to add their own personal flair of unique customization that pre-packaged tea bags simply can't match.
There's a certain enjoyment in cradling a warm cup of tea, knowing that the very essence of it — right down to the bag — has been made by your own hands. The satisfaction deepens when each sip is a testament to your uniquely curated blend.
Why Choose Homemade Tea Bags?
Creating your own tea bags offers various appealing benefits catering to personal preferences and broader global concerns:
- Personalization: The freedom when crafting homemade tea bags gives you the ultimate opportunity for customization. Whether you have a knack for unique tea blends or specific herbs, the flexibility to mix and match ensures that every sip matches your distinct taste and mood.
- Sustainability: In an age where environmental conservation is essential, homemade tea bags are a great way to lead a greener lifestyle. Some storebought versions are non-biodegradable, so homemade bags can help reduce waste and champion eco-friendliness.
- QualityControl: By making your own tea bags, you can guarantee the fabrics are organic and devoid of harmful dyes. Also, you can make sure that the chosen teas and herbs are uncontaminated pesticides or artificial additives, promising a purer, more authentic tea experience.
- Economic Efficiency: Over time, crafting your own tea bags can be more pocket-friendly. Investing in quality materials and loose tea upfront can lead to cost savings in the long run, especially when compared to frequently purchasing premium tea bags.
The shift to homemade tea bags is both a trend and a conscious choice, merging personal satisfaction with global responsibility.
What Materials Do You Need for Homemade Tea Bags?
Crafting your own tea bags does call for the right materials — but the good news is the beauty of this DIY project lies in its simplicity, as many of the materials are items you may already have.
Here's a list to get you started:
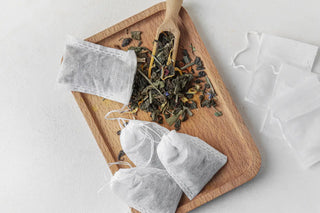
- Fabric: The foundation of your tea bag is important. Options such as muslin and cheesecloth stand out for their fine mesh quality, ensuring that tea leaves remain enclosed while allowing the flavors to seep through beautifully. Make sure whatever fabric you choose is untreated to avoid any unwanted chemicals entering your brew.
- String or Twine: You’ll want to seal your tea bag with string or twine, and it’s best to opt for natural, unbleached varieties for the best results.
- Cardboard or Paper Tags (Optional): If you're aiming for a touch of authenticity or personal branding, paper or cardboard tags can be attached to the string's end. These can be as simple or decorative as you desire.
- Scissors, Needle, and Thread or Sewing Machine: Use these tools for shaping and sealing your tea bags. If you're a beginner, hand-stitching is manageable, but a sewing machine can speed up the process for seasoned crafters.
- Loose Leaf Tea or Herbs of Choice: Whether you're a fan of classic black tea, calming chamomile, or our Wellness Functional Tea blend, the choice is yours. Remember, the quality of your tea or herbs will play a pivotal role in the final taste, so select with care.
How To Make DIY Tea Bags
Now that you’re equipped with the proper information and have your materials ready, you can begin crafting. The following step-by-step guide ensures that your transition from novice to master is as seamless as your tea's infusion.
1. Cut the Fabric
Start by laying your chosen fabric flat on a clean surface. Measure and cut squares of about 3.5 to 4 inches on each side. This dimension provides enough room for the tea to expand during steeping while retaining a neat appearance.
2. Prepare the Tea Blend
Mix your selected loose-leaf teas or herbs in a mixing bowl. For most teas, using 1 to 1.5 teaspoons for each bag should be sufficient, but this may vary based on personal preference.
3. Fill the Fabric
Lay out the cut fabric and place your tea blend in the center, ensuring a margin around the edges to facilitate sealing.
4. Seal the Tea Bag
Fold the fabric diagonally, keeping the tea at the center. Stitch around the open edges using a needle, thread, or sewing machine. Ensure the stitches are secure so no tea escapes during the steeping process.
5. Attach the String
Cut a piece of string or twine roughly 6 inches in length. Secure one end to the corner of the tea bag. Attach the other end of the string to your cardboard or paper tag if you're including a tag.
6. Final Touches
Trim any excess fabric or threads for a neat finish. Personalize the tag, if desired, by stamping, writing, or decorating it.
7. Storage
It's important to keep your tea bags fresh. Store them in an airtight container, away from moisture and strong scents, to preserve their flavor.
With these steps, you can turn simple materials into delightful, customized tea bags. Now, whenever you're in the mood for a refreshing brew, you have a personal handcrafted option waiting for you.
What Are Some Tips for Perfecting Your DIY Tea Bags?
Crafting the perfect tea bag is an art, and refining your technique can make all the difference. Here are some tips to ensure your DIY tea bags offer the best possible experience:
- Even Stitching: Consistent stitches prevent tea leaves from escaping and give your bags a professional look.
- Storage: Once crafted, store your tea bags in an airtight container to retain freshness and flavor.
- Don't Overstuff: It might be tempting to fill up your DIY bags to the brim, but tea leaves need space to expand when steeped, ensuring a fuller flavor release.
- Steeping Duration: Each tea variety and herb has its optimal steeping time. Always check and label the steeping duration on your DIY bags for a consistent taste.
- Quality Over Quantity: It's not just about the bag, but what's inside it. Always choose fresh, high-quality loose-leaf tea or herbs. The essence of your brew largely depends on the ingredients' quality, so don’t compromise. “Look for herbs that are from suppliers tested by an independent third party for quality and absence of heavy metals or other harmful substances,” notes Heidi Wright, Registered Nurse and Certified Herbalist.
- Use Natural Dyes for Customization: Always opt for natural dyes to color your fabric. This ensures that no chemicals leach into your brew.
Not feeling crafty? We have you covered. Reach for one of our functional teas, which come in tea bags, to enjoy your cup of tea without the art project.
Conclusion
At Herbaly, we’re dedicated to enhancing your wellness journey and tea experience. Creating your own tea bags can heighten the joy of sipping on your favorite brews and can help promote conscious choices for our environment.
Every sip from a tea bag you’ve crafted is a testament to the passion and care you bring to your daily rituals. Cherish it, and enjoy the wellness in every cup.
Sources:
Inflation drives homeowners to opt for DIY home improvement | USA Today
How to Use Cheesecloth: 6 Ways to Use Cheesecloth | MasterClass
The global eco-wakening: how consumers are driving sustainability | World Economic Forum
Chamomile: A herbal medicine of the past with bright future | PMC